Monday 18 November 2019

One year on

Who'd have thought that one year has passed since my RV12's first flight.  Time to post the final update on the build!

Since gaining the full LAA Permit-to-Fly in January 2019, the aircraft has flown an additional 35 hours, making a total of 41.5 in the first year.  That 35 hours under my control is more hours than I'd flown cumulatively in the previous 4 years!  Fortunately my check-out was very quick, one flight with Peter Lennard, a commercial pilot from work who previously instructed on Eurostar's.  We mainly concentrated on circuits and then some stalls to ensure I was safe.  The en-route handling is very easy.

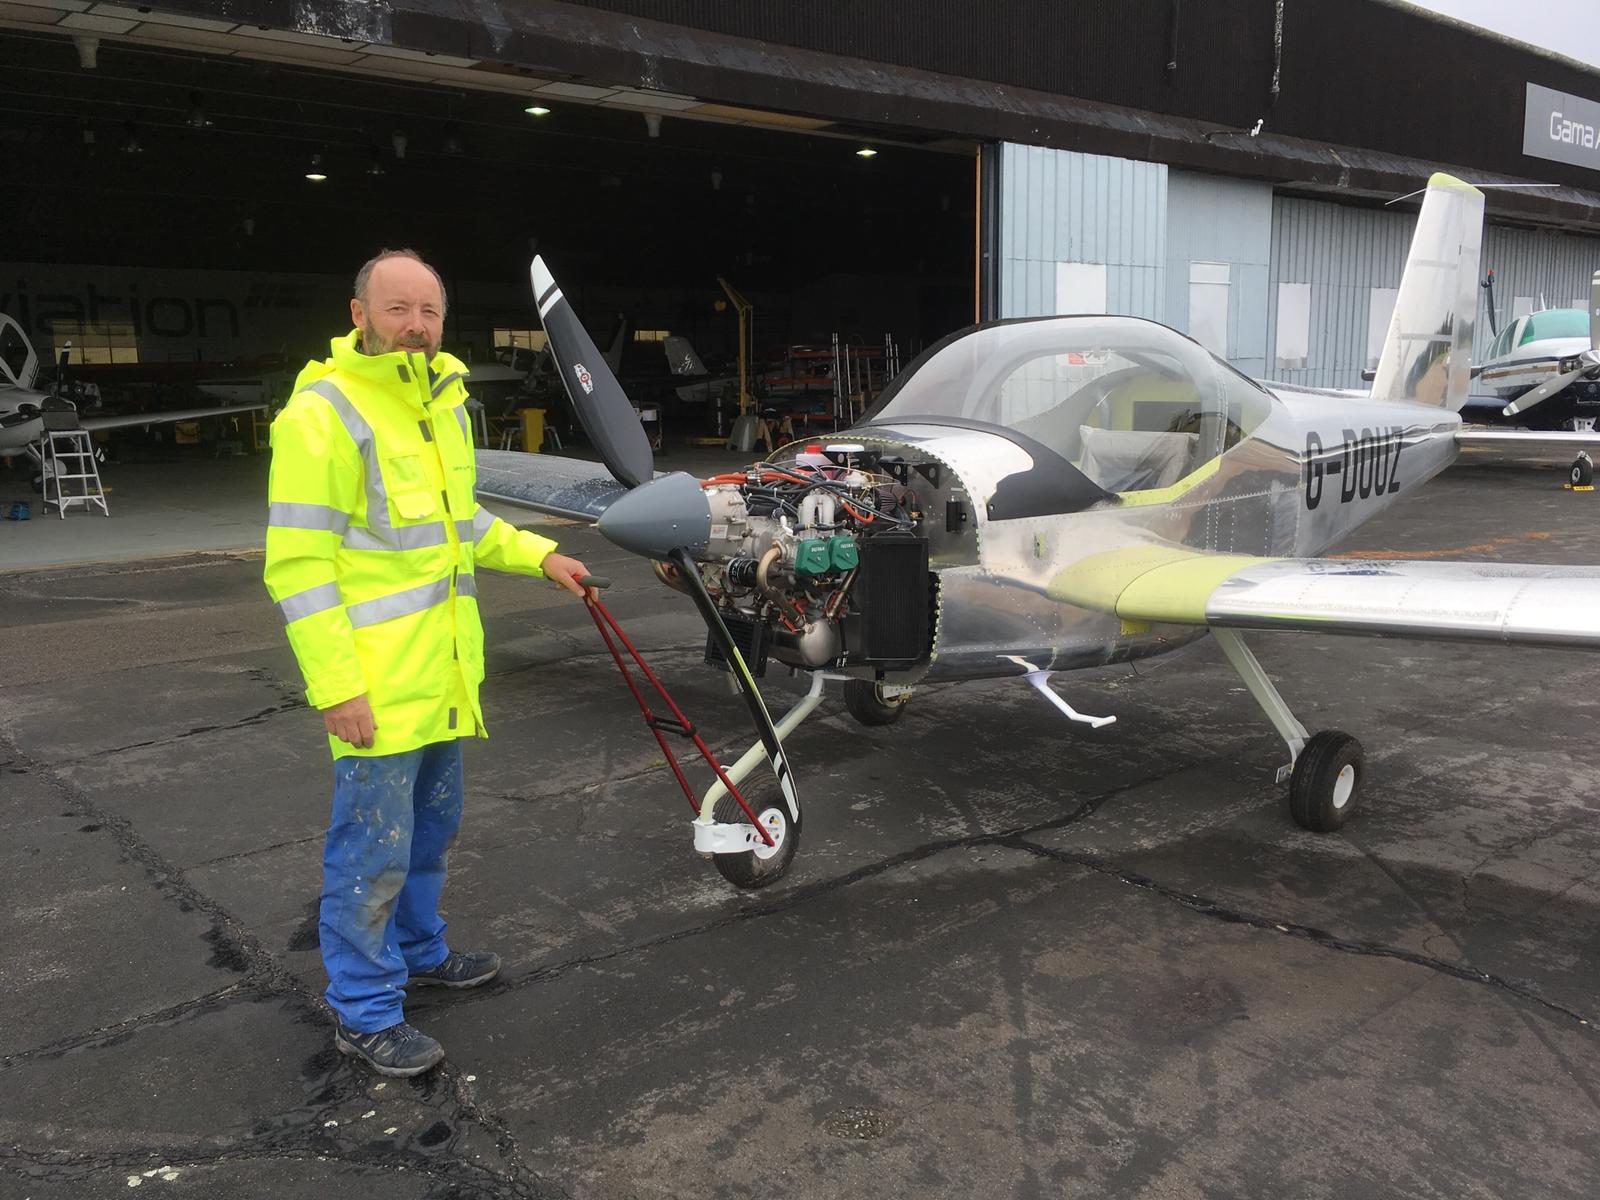
Anyway, the major outstanding item for the build completion was to get the aircraft painted.  This had been planned for January/February.  As with most things, this slipped, so we flew the aircraft around the country in bare metal for a few months.  Our longest trip was to Bolt Head in South Devon - about 90 minutes each way, and my first landing at a farm strip in the RV.  Anyway, our paint slot was finally available and I took the aircraft to Mick Allen's Turweston workshop on 1st July.  I then stripped the aircraft down ready for Mick and his sons to work their magic.


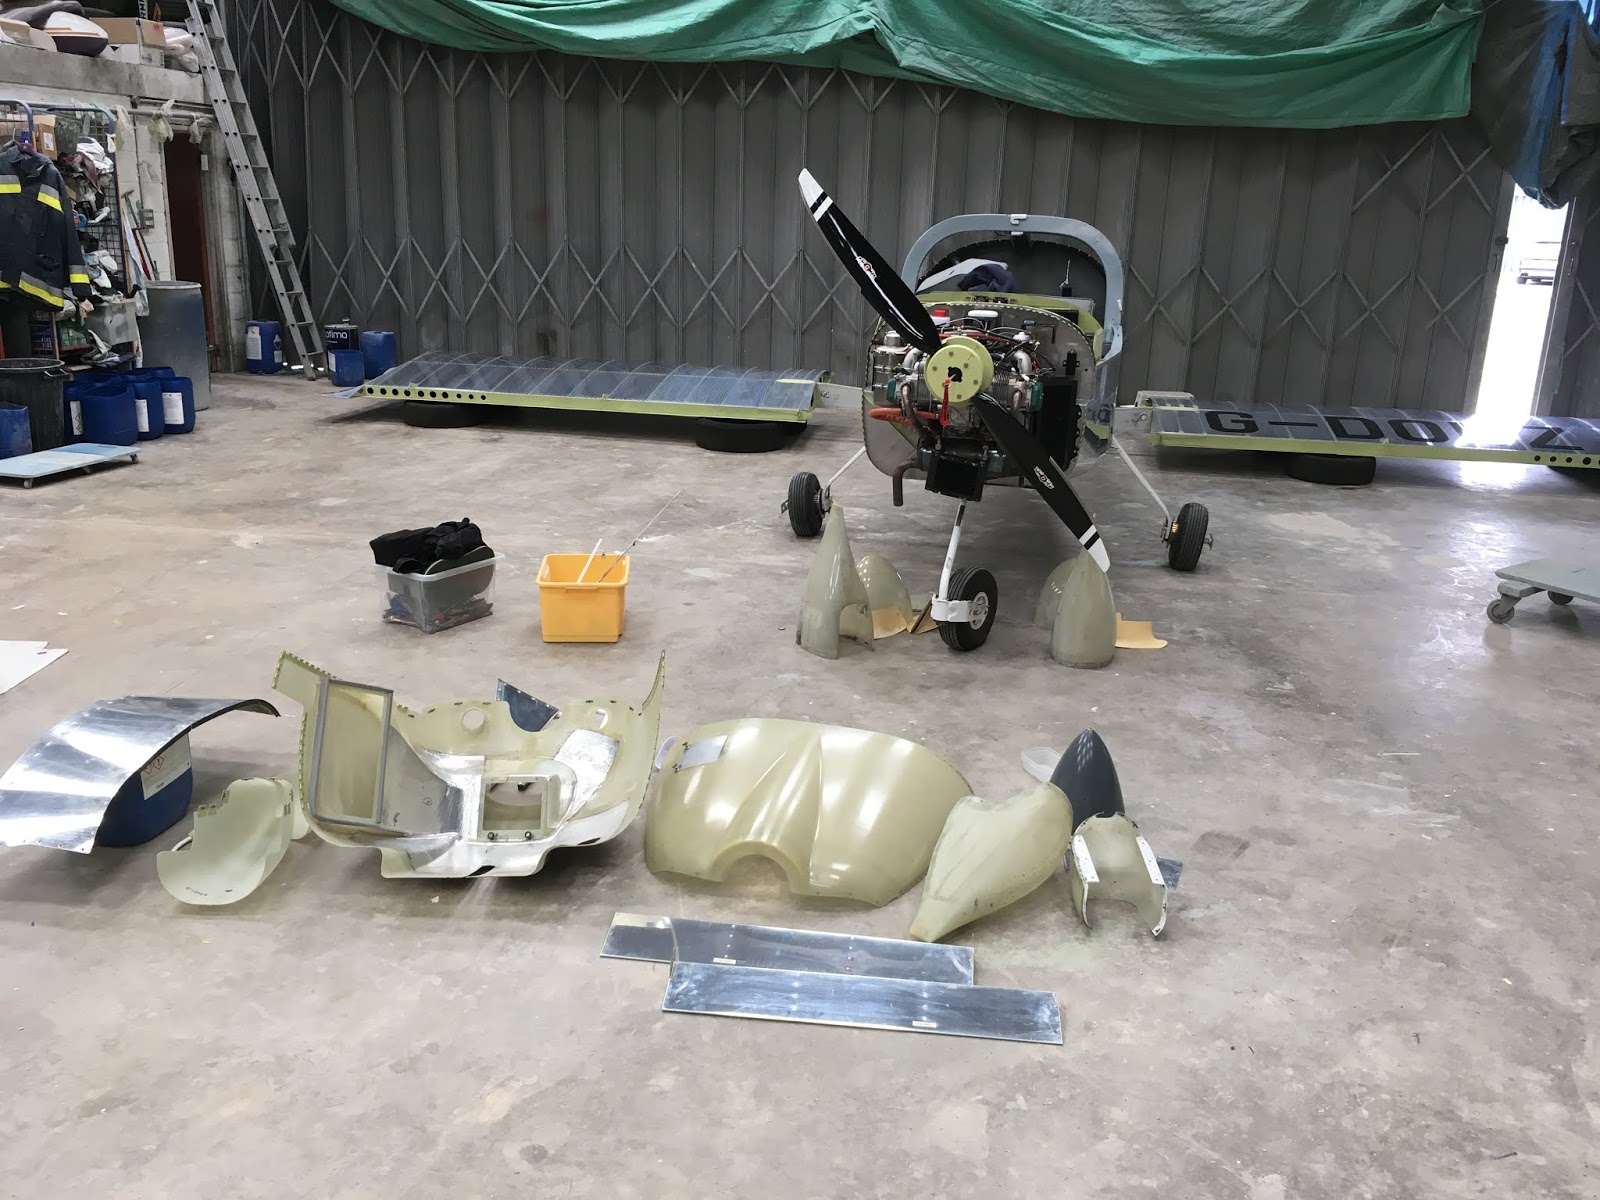
I made a view visits during the process to see how things were progressing   A huge effort went into sorting the fibreglass parts, particularly the engine cowlings and wheel spats, which were full of pin-holes as supplied by Vans (I think newer kits now come with gelcoated fibreglass with a much better finish).  The constant filling and rubbing down was something I definitely didn't want to do myself - I hate fibreglass! 

I did want to help out getting the stripes right per the paint scheme I'd supplied to Mick (a partial copy of one I'd seen on-line) and he went to considerable trouble to ensure I was happy with the end result.


We had a family wedding which kept me away from the paint shop for the last couple of weeks, but with the LAA rally looming and Mick aware that I really wanted to attend, he let me know that all was ready for re-assembly, so I duly popped up to Turweston for two days, culminating in a re-weigh and then final inspection and sign-off by Jerry.  


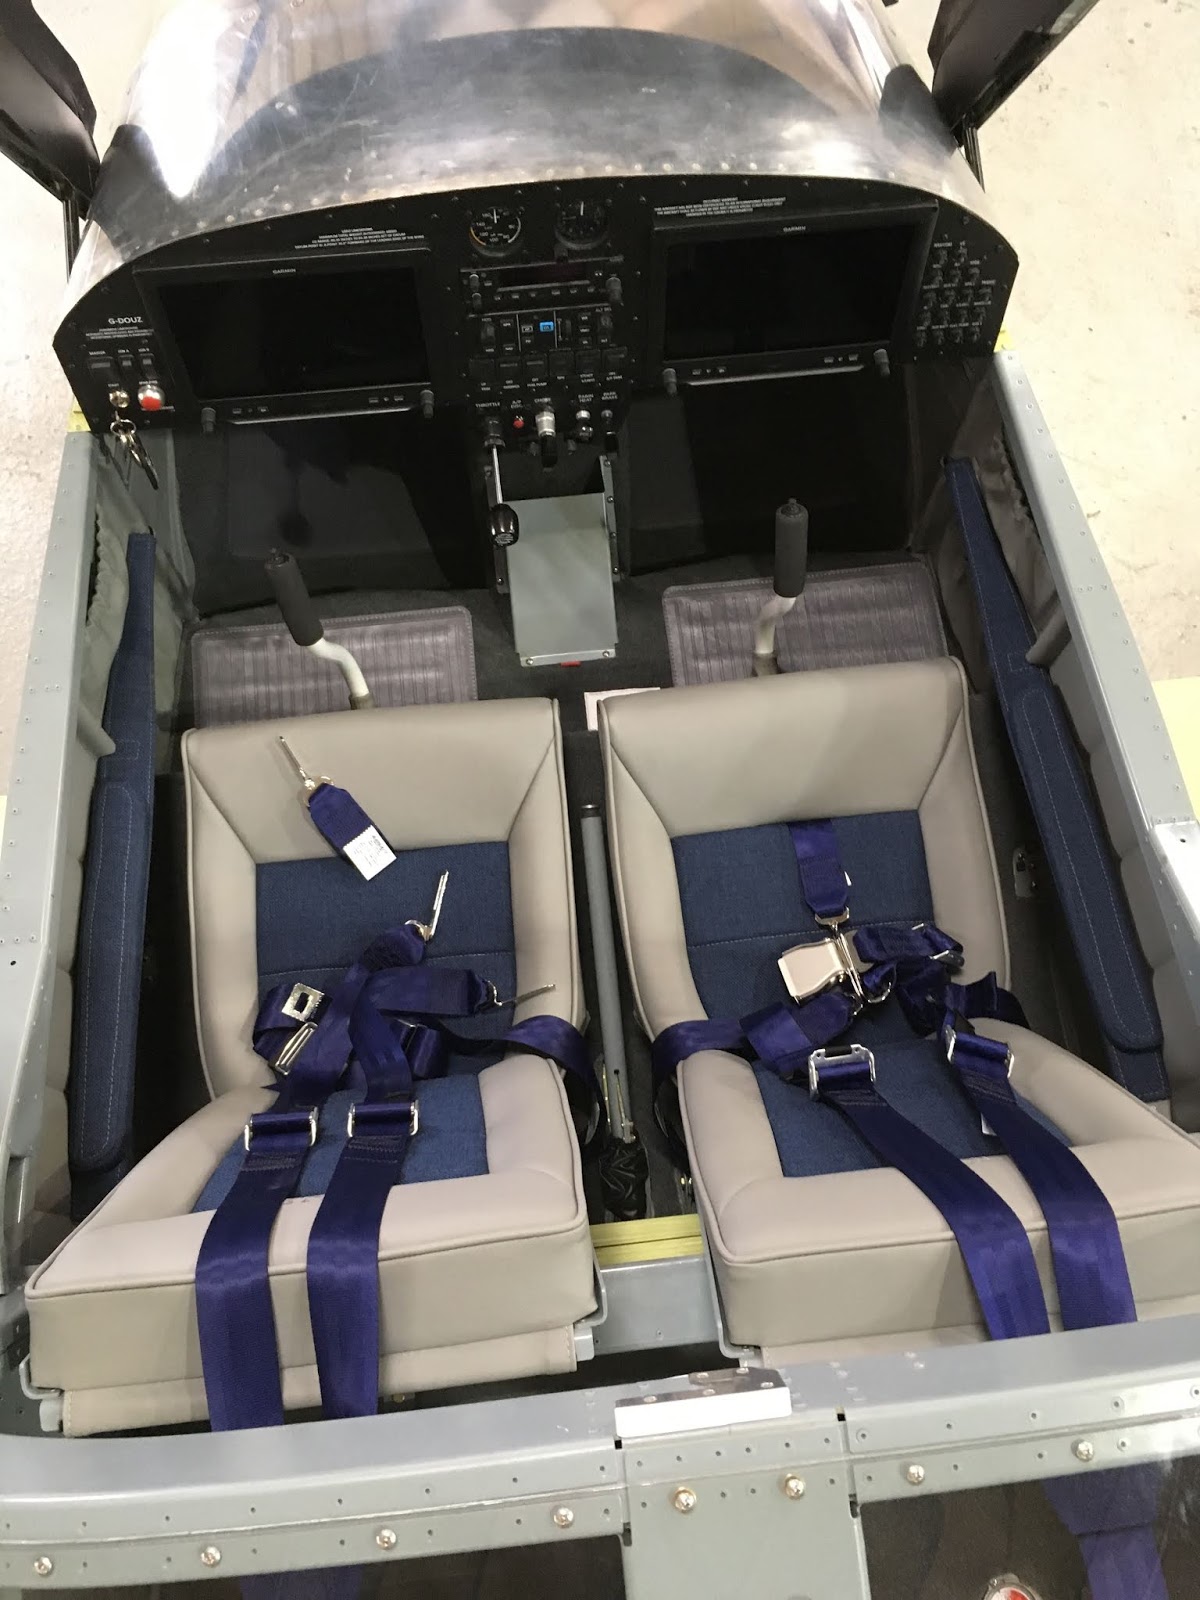
The aircraft is certainly not the lightest RV12 ever built (it has every availabe option and more), but still allows for two 12 stone (168 lbs) passengers, full fuel (75L) and the full 50 lbs of baggage, so does everything I want.  One additional good result is that the C of G has moved aft by 1.5" from the pre-painted condition, so I can get rid of the 15 lbs ballast weight I was carrying in the baggage bay. 

I collected the aircraft on 29th August and then flew to Sywell for the LAA rally on the following day.  I'm delighted with the end result and the aircraft received lots of positive comments.  This was also my first experience of camping since 1986 and maybe something not to be repeated too quickly (no sleep due to generator noise for the security lights) but I was still very pleased to get there!  


Since the rally, I've installed the canopy seal kit which has got rid of the huge draughts in the cockpit.  I've also had to replace the small bush in the propellor spinner that supports the pitot tube, so there's a small amount of paint touch-up to do.  Other than that, the aircraft has been 100% serviceable for the whole year.  

Plans for the future include changing the current battery for the latest Vans-specified Lithium version which will save 10 lbs.  This is a job for the annual inspection in January along with replacing the rear window with the newer moulded version as mine has small cracks around some of the screws.  I also have to change the No. 2 exhaust down-pipe as there is a Vans service-bulletin concerning fatigue cracks.

Flying the RV12 is a delight, with amazing visibility and really light but well-harmonised controls.  Going back to the PA28 is like driving a bus!

That really concludes the story of building my RV12.  Next year I hope to do a few longer touring trips with my wife Deborah (a happy passenger fortunately) - maybe around the Scottish Islands and to the Scilly Isles.  I hope you've enjoyed following the blog.


Thursday 22 November 2018

First flight (and more) !

On Saturday 17 November G-DOUZ finally became an aeroplane!  In the safe hands of Jerry Parr, my LAA inspector and fellow RV12 builder, the first flight lasted 30 minutes with about 6 circuits of Fairoaks.

Jerry about to depart on the first flight.

A short video of the aircraft returning.

Following the first flight which went fine with no issues at all (Phew - that was a relief), we removed the cowlings for a good look at the engine bay - checking for any leaks and anything loose.  Then a good look around the rest of the aircraft before preparing for a longer flight with me on board to do some more shake-down tests.

Here we are taxiing out for the second flight  -planned to be the required 2 hour duration test.  We achieved everything we wanted and then did 10 touch-and-goes and the final  landing to build towards the 15 landings the LAA require for the Permit test programme.

So at the end of day 1, the aircraft had flown 2 hours 35 minutes and completed 12 landings with no snags and no adjustments needed.  Not a bad day at all!

Last job of the day was to re-fuel ready for the next stage.

A happy owner with a home-built aircraft that flies!

With the weather behaving we decided to try and complete the entire test programme over one weekend, so Sunday morning saw us load the aircraft to maximum weight (1320 lbs/ 600Kg) with full fuel and some ballast in the baggage bay, in preparation for the performance height climb test.

I didn't get any decent photos in what was a busy flight and it was quite turbulent but did take screenshots from the Garmin G3X to record specific test points, so here are a few which show just how good an RV12 really is!

First minute into the 5 minute performance height climb.  This is flown at best-climb speed of 75 knots and Jerry did a great job keeping within the 2 knot tolerance and slip-ball centered when you consider the significant wind and bumping around!  The G3X has a built-in data-logger which records all of the engine and air data parameters each second, so I didn't need to write everything down.  You can easily analyse the data in a spreadsheet.

En-route to the test area from Fairoaks.  This is the map in front of the co-pilot/passenger but can be switched into a full instrument display as shown in the other pictures.

Straight and level Wide Open Throttle (WOT) test to measure the indicated airspeed and make sure the engine doesn't exceed maximum RPM (5800).  That's a quick aeroplane to make 120 kts in level flight from 100HP.

Max continuous RPM test.  Some people regularly fly their aircraft like this but I think something more economical (4800 rpm) is fine as this will still produce 105 kts.    Ignore the fuel-flow reading (Litres Per Hour) as it's currently garbage - this needs to be calibrated across several tanks of fuel.  The realistic figure is nearer to 18 LPH.

We also carried out a Vne (Never exceed speed) dive to 136 kts and checked that the controls performed correctly with small and gentle inputs - all a non-event. 
The last major test items were stalls in clean, approach flap and full flap conditions and all went fine - a slight right-wing drop as expected but nothing unmanageable.

Finally a bit of avionics play-time for me,  to check the autopilot and radio. Having installed loads of autopilots in light aircraft, I was really surprised at just how good the G3X experimental autopilot is - it's miles ahead of anything I've played with before in certified general aviation aircraft and the capabilities are huge.    Above you can see we're tracking towards a GPS waypoint (CPT) with a huge crosswind of 41 kts and its holding us dead on track.  Should make light work of long-distance flying.

On completion of this flight which lasted 2 hours 45, we completed a further 3 landings to bring to the total to 15.  No snags and a great aircraft to fly.  

With the test flying all completed, we wrapped up the paperwork and it's all been submitted to the LAA for review and hopefully the issue of a full Permit-to-Fly.  As soon as I have that I can get checked-out and finally fly the aircraft on my own.  

All being well, I'll get to fly about 10 hours over the winter before the aircraft goes to the paint shop in January/February and then I have to take it all apart again!


Saturday 6 October 2018

Ready to fly!

It's been a busy couple of weeks since the first ground run, completing assembly and the remaining ground tests.  The culmination of this effort was Jerry's final inspection and submitting the paperwork to the LAA in order to obtain the permit-to-test.

So a brief look at what's been going on.  

 First was to install the wheel pants and leg fairings plus the tail-cone covers in preparation for weighing.

The belly access panels were fitted, which also included modifying one to allow the fuel tank drain to be accessible. 

A mandatory requirement is a fireproof identification plate fitted to the fuselage. This was produced by a Boundstone, a local engraving company in Farnborough. I didn't want to fit it on the outside prior to painting, so it's on the left side of the tunnel in the pilot's foot-well.  There will be a second one without the registration fitted near the tail once painting is complete. 

Next came the carpets and side trims, plus the map pocket on the tunnel.   Yes, the fireproof plate is hidden, but the reg's don't say it needs to be on show, just that its fitted!

The seat belts and seats are fitted.  It's going to be a cozy place for two people!   

The final item to be installed was the Vans optional glareshield together with the UK-mandated standby compass.  The glareshield was bare grey fibreglass, so I painted this satin black and installed an edging trim to protect heads from sharp impacts!

After the interior was installed, it was time to go back out of the hangar for more engine ground runs, ADAHRS tests and a compass swing.  I also wanted to use up some of the remaining fuel.  

With the compass wing and ADAHRS vibration checks all passed OK, it was time to prepare for weighing.  The aircraft had to be de-fuelled to minimum usable level by pumping any remaining fuel out using the electric pump. Here's the first of two 20L cans being filled.

For correct weight and balance calculations, the aircraft has to be leveled to flight attitude and placed on scales.  I bought three 300kg digital scales and used some ramps from the hangar.  Not shown above was the method used needed to get the aircraft level, which could be by adding planks under the main-wheels scales.  Instead I let the nose-wheel air out! 
The empty weight came out at 784.5 lbs, which is a little bit more than I expected, but I do have all of the available options installed.  I've since calculated that the aircraft can carry two 13 stone (182 lbs) people, full fuel and 50 lbs of baggage, so there's no loss of capability due to excessive weight.

One unexpected problem arose whilst working through the Vans-supplied post-build test programme, in that I couldn't get the stall vane to produce any audio warning.  I discovered that Vans don't use stall audio from the Garmin G3X EFIS, instead producing a warning tone from a circuit board in the AV5000 junction box -  which I don't have!   Therefore I've installed a dedicated stall horn (round white unit above, behind the pilot's instrument panel) which will operate regardless of the G3X or radio working, and allows a standard pre-flight test to be performed.  The G3X will still generate audio warnings from the angle of attack system and that will be heard through the headsets, so I have a fail-redundant system.

The last job to do was for Jerry to visit and perform the final Permit Release inspection.  This involved checking all control range of movements, checking placards and looking at the final assembly jobs and tests I'd been performing over the last 2 weeks.  We also put the aircraft on the maintenance trestles as shown above, to check clearances of the wheel pants and leg fairings in flight condition.

Finally, we went through the paperwork to ensure everything needed for the application for a permit-to-test was supplied to the LAA and correctly sign-off.  Now it's just a matter of being patient whilst the LAA process the document pack and we get the permission to go flying! 

The finished aircraft ready to aviate!


Sunday 23 September 2018

Final assembly and first engine runs

It's been a busy week since moving to the airfield.  The aircraft has been assembled, controls rigged, avionics ground-tested and the engine run for the first time!

So a brief review.  First the final assembly and control rigging.


Here I've clamped the rudder between two pieces of plywood so I can mark and drill the rudder cable links. 

Here I've installed the anti-servo tab control arm and pitch trim actuator.   

This is a view of the trim actuator try and push-rod. There is no manual trim so if the electrics or trim motor fail, the trim will be locked in the last position. 


A view inside the aft fuselage of the tensiometer on one of the stabilator cables.  Both cables have to be tensioned to 35-45 lbs and at the set time, adjust the upper and lower cables to get the correct range of movements.  A bit fiddly and time-consuming.

So next was installation of the propellor.  I had previously installed it at home to get the spinner aligned and the pitot tube fitted, but hadn't tried setting the blade pitch angles.  

A view of the inclinometer showing the propellor blade pitch using the Vans'supplied alignment tool.  It took a while to get both blades to the same angle (71.4 degrees specified by Vans).  Before ground running, Jerry checked the blade-tip  run-out for me and it was fine.

Next came the wings.  I had some work to complete with the AoA sensor installation on the left wing as well as fittng the registration letters.  I also had to remove the blue plastic and clean off all the sharp points from the pop rivets.

 Left wing on trestles all cleaned and ready for the registration, with the right wing on the transport stand with just the blue plastic to remove from the flaperon.

 Final registration letters fitted on the underside of the left wing.  These are temporary stickers just for the test flying phase and the proper versions will be sprayed as part of the aircraft painting in the new year.

Any finally a complete aircraft with all controls installed and correctly rigged.   In fact I had to take the wings off again to trim the flaperon skins where they were rubbing on some fuselage rivets, and to correct a problem with the stall warning connection.  I had crossed 2 pins at the wing-root connection so had a permanent stall warning alert on the PFD.

With aircraft all assembled, the next job was to leak check the fuel tank and pipework and then carry out a fuel-flow check to ensure the electric pump delivers the required volume.  There we no leaks so I put on 10L of unleaded car fuel and performed the flow checks.  Three tests of 15 seconds each and one of 60 seconds confirmed an average flow of 104 litres/minute, which is fine.

This is the fuel flow set-up with a temporary pipe connected to the output port of the mechanical pump and running into a calibrated 3L jug.

With fuel checks done, I drained (pumped out) the unleaded car fuel and had the first 30 L load of Avgas from he airfield bowser ready for round runs.
Jerry came to do the post-assembly inspection and ground runs, so after  a bit of additional wire-locking and priming the oil system, we went outdoors for the first time to give the engine a try.


After a first test with the ignition off the ensure the engine rotated, it fired at the first attempt.  A little more choke and it was away!  


A screenshot of the PFD showing all of the engine parameters correctly indicating.

We then performed the carburettor balance using Jerry's test kit and my first chance to get in and run the engine whilst Jerry made the adjustments.  On completion, the engine runs extremely smoothly and has a ground max RPM of 5040 and an idle of 1500, so all good for flying.  The final bit for the session was to see how well it taxi's and test the brakes.  We had a small try in front of the hangar and then went for a loop around the taxiway, down the runway at 35 kts and back to the hanger. 

Yours truly putting the aircraft away.  It was a rainy day but worth getting wet!     All in all and excellent day and lots of thanks due to Jerry for his guidance and support.